
Expresso® makes it easy to update and segment your customer communications with new information about changing business conditions, disclosure rules, products, services and more.
But changes, especially if they are done in haste, can introduce errors—to content and formatting.
Nordis’ Expresso offers a unique CCM capability called review output that allows users to check how changes are rendered in the PDF document before print production and/or digital delivery and presentment.
With review output, you can spot and correct any problems before generating thousands or millions of documents that are missing information, have a typo or have fields, rules or content that don’t execute properly.
When to use review output
It makes sense to take advantage of this safety net whenever you:
- Edit a custom table, such as moving from standard hours of operation to custom hours by location
- Onboard a new provider client or resort HOA
- Create new documents
- Set up new packages
- Revise or delete content in a zone
- Update images and logos
- Change variable data, such as account numbers
- Add new messaging, offers and other personalized information
How review output works
Review output adds an extra quality assurance step to the communications management and production process. After you send a file to Expresso, you’ll receive an email, usually within 30-60 minutes, notifying you that the file is pending.
At this point of the process, the file is in a staging area. You can preview the final output for print copy, secure emails and presentment archives. The file will not advance to the print production or digital delivery and presentment step until you sign off.
Using review output
Find the Review Output tab under the Data top navigation drop down,
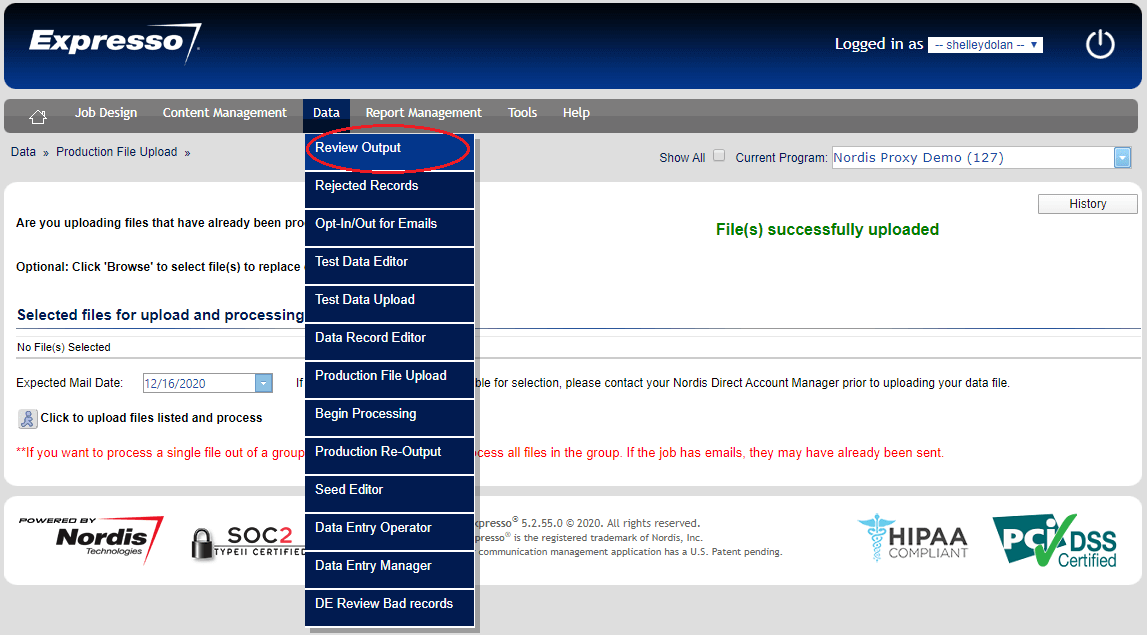
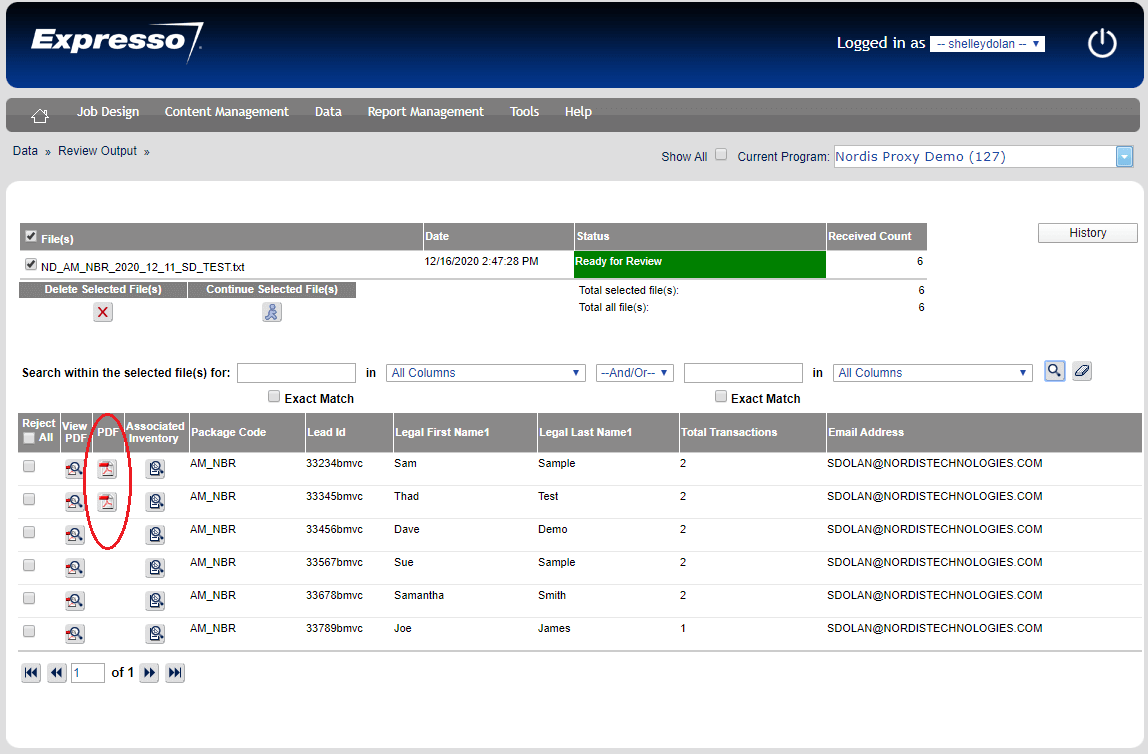
- Click on the pending file. It lists all of the records in the user interface.
- Search for records to preview. You can review all of them or select specific ones. For select records, you can configure the review output function to search for records based on any data or fields, such as account number, in the document. A gray bar in the middle of the screen lets you search by up to two fields, such as city and zip code.
- Select file(s) to preview by clicking on the box next to each record and see them rendered in their PDF form.
- If the preview shows no mistakes or problems, click on the running person icon under the tab “Continue Selected File(s)” to approve the job.
- The file goes to production and distribution.
- You can click on the button to “Continue” multiple files to create one processing job.
Fixing a content mistake
If you see a typo or other content problem:
- Go to the piece of content in Expresso.
- Make the necessary change.
- Preview the package and make additional changes as needed.
- When the changes are satisfactory, approve the package.
- Contact your Client Services Manager to elevate approvals. No need to delete the file and re-upload to the SFTP unless there are issues with the data itself that need to be corrected.
- Return to Review Output.
- Click on “View PDF” and check the updated file to ensure your changes are satisfactory.
If no other changes are needed, click on the ‘Continue Selected File(s)’ button.
More options
- Selectively reject records. You can delete certain records by checking boxes in the left column next to those records while approving the rest. This feature is handy for companies with IT systems that can’t easily remove specific records, such as those in dispute. It’s also useful when there’s a problem with records for a customer subset, say, total amount due for 10 out 20,000 records.
- Reject all records. The gray bar in the middle of the screen has a box to check if you want to reject all the records.
- Dynamic review output. Nordis can set up parameters that trigger review output under specific conditions, such as any file exceeding a specific volume, say, 10,000 records.
- Create audit trail. Use the history feature that includes the user name, date and time stamp of files previously approved or deleted.
- Delete entire file. Select the box next to the file name and click on the “Delete Selected File(s)” button.
From proofing the first batch of documents for a new client to seeing how a new image appears on a bill, review output is an important safeguard against mistakes on critical customer communications. Let us know if you’d like to learn more at sales@nordistechnologies.com.